Workflow Triggers
Triggers are events that initiate your workflows. Every workflow in Wakflo must have exactly one trigger that defines when the workflow should run. This guide explains the available trigger types and how to configure them effectively.
Event-Driven
Respond instantly to real-time events from your connected apps
Scheduled
Run workflows automatically at specified times or intervals
Webhook
Accept data from external systems via HTTP endpoints
Trigger Types
Wakflo offers several types of triggers to accommodate different automation needs.
App Triggers
Real-Time Events
Respond instantly to events from your connected apps
Schedule Triggers
Time-Based Automation
Run workflows at specific times or intervals
Webhook Triggers
Webhook triggers create unique URLs that can receive data from external systems. When data is sent to the webhook URL, the workflow is triggered with the received data.
Use webhooks for:
Configuring Triggers
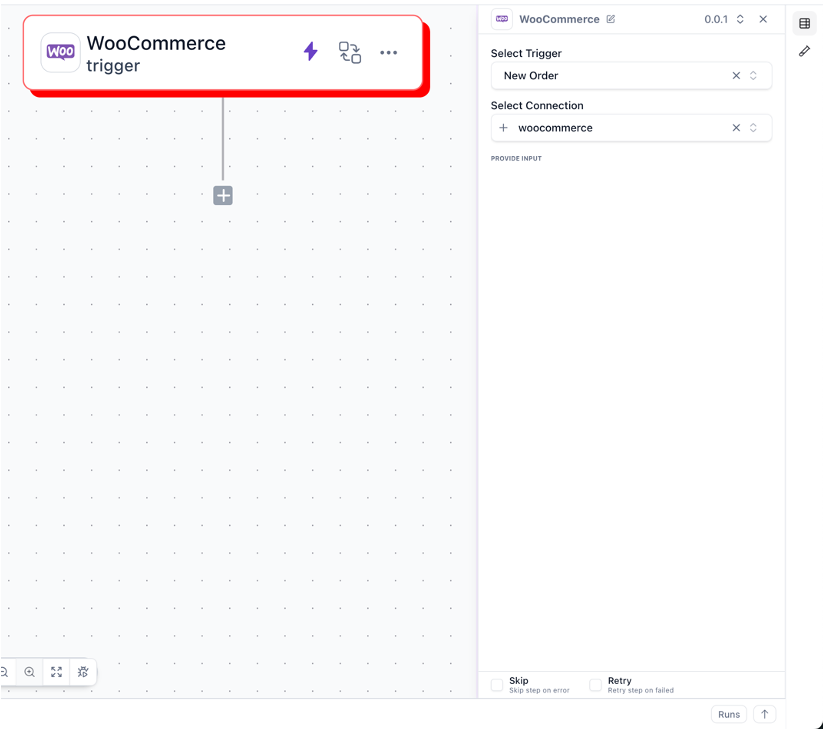
Platform Trigger Configuration
To configure a platform trigger:
Select platform
Choose the integrated platform (e.g., Shopify, Amazon, WooCommerce) from the trigger dropdown
Select event type
Choose the specific event that will trigger your workflow
Configure filters (optional)
Add conditions to filter which events trigger the workflow (e.g., only orders over $100)
Test the trigger
Use sample data to verify your trigger works correctly
Pro Tip: Use filters to make your trigger more specific and avoid unnecessary workflow executions. For example, if you only need to process high-value orders, add a filter for order value > $100.
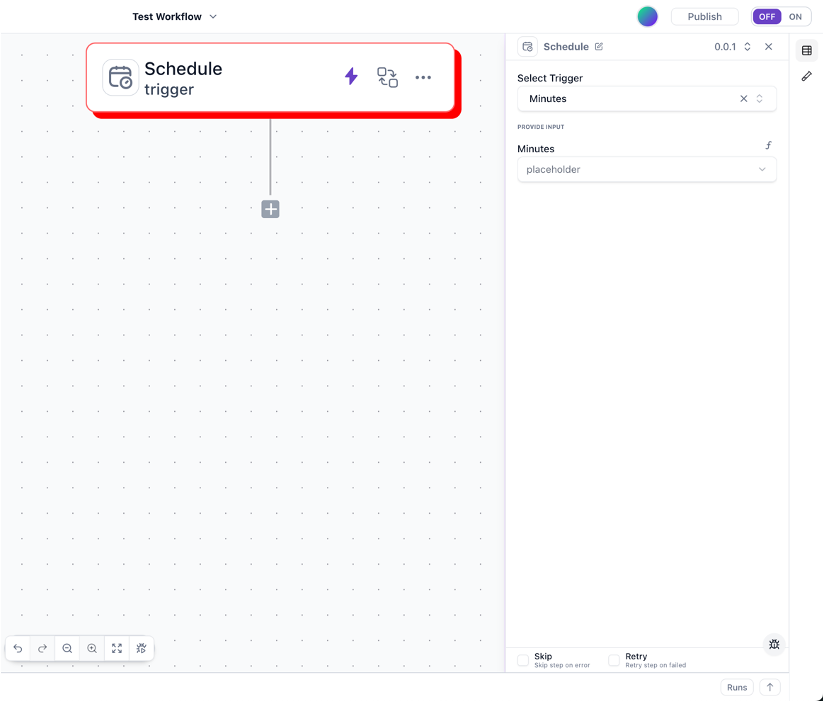
Schedule Trigger Configuration
To set up a schedule trigger:
Select frequency
Choose from options like hourly, daily, weekly, monthly, or custom
Define timing
Set specific times, intervals, or days when the workflow should run
Configure time zone
Select the appropriate time zone for the schedule
Set advanced options (optional)
Configure settings like retry behavior or execution windows
Time Zone Alert: Schedule triggers are based on the Wakflo server time zone unless you specify otherwise. Be sure to select the correct time zone for your business needs.
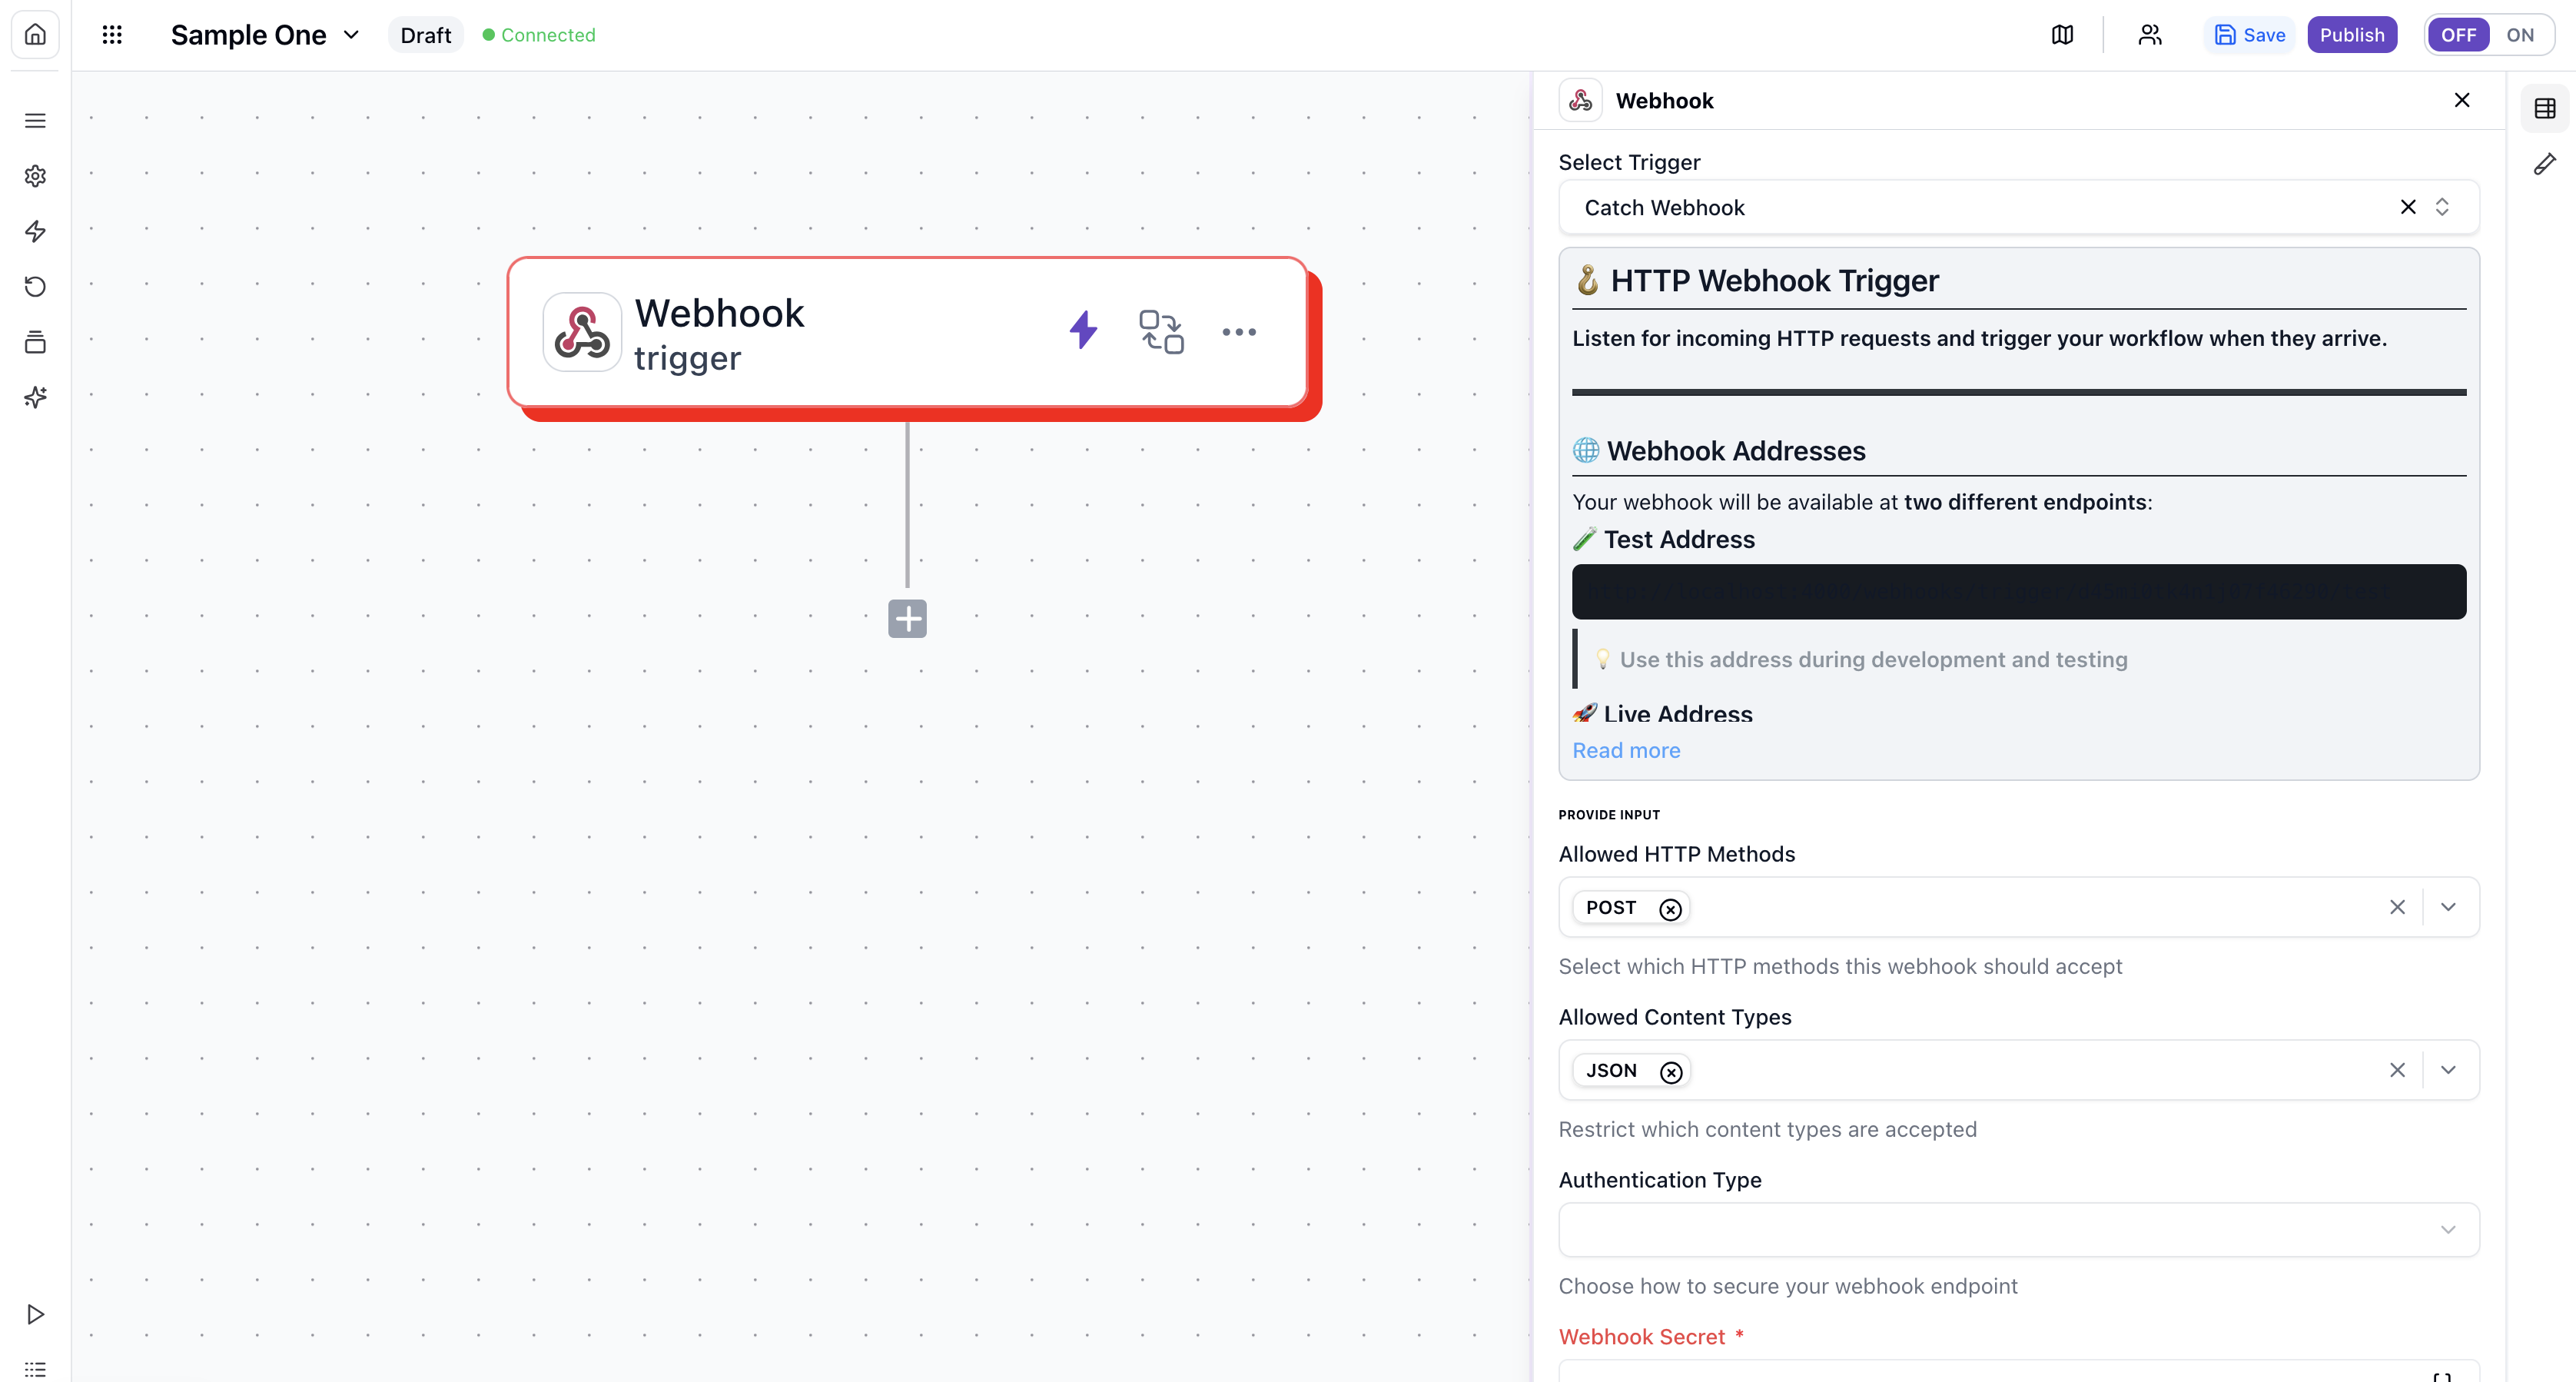
Webhook Trigger Configuration
To configure a webhook trigger:
Create webhook
Generate a unique webhook URL for your workflow
Define payload structure (optional)
Specify the expected data structure for validation
Configure authentication (optional)
Add authentication requirements like API keys or secret tokens
Test the webhook
Send a test request to verify the configuration
Webhook URL: When you create a webhook trigger, Wakflo generates a unique URL in this format:
https://hooks.wakflo.com/trigger/1a2b3c4d5e6f7g8h9i0j
Trigger Best Practices
Follow these best practices to create reliable and efficient triggers.
Performance Optimization
Use specific filters
Make triggers as specific as possible to avoid unnecessary executions
Choose appropriate frequencies
Don't schedule workflows to run more frequently than needed
Consider volume
For high-volume events, consider batch processing or sampling
Reliability
Configure retry logic
Set up appropriate retry behavior for failed triggers
Monitor trigger health
Regularly check logs to confirm that triggers are firing correctly
Data Handling
Validate trigger data
Always verify that expected data is present
Handle missing fields
Implement checks for required fields and fallback values
Data transformation
Clean and format trigger data early in your workflow
Common Trigger Scenarios
Click to expand common use cases and examples for each trigger type.
Order Processing Triggers
- New Order: Trigger when a new order is placed
- Order Status Change: Trigger when an order status changes (e.g., paid, shipped)
- Order Cancellation: Trigger when an order is cancelled
Inventory Management Triggers
- Low Stock Alert: Trigger when inventory drops below threshold
- New Inventory: Trigger when new inventory is received
- Price Change: Trigger when product price changes
- Scheduled Stock Check: Regular inventory audits
Customer Management Triggers
- New Customer: Trigger when a new customer signs up
- Customer Tag Added: Trigger when a customer is tagged (e.g., VIP)
- Customer Data Update: Trigger when customer information changes
Troubleshooting Triggers
Common issues and their solutions for trigger problems.
Trigger Not Firing
Common causes and solutions:
- •Verify the integration connection is active
- •Check that trigger filters aren’t too restrictive
- •Ensure the event is actually occurring in the source system
- •Review webhook URL and authentication settings
- •Check platform API permissions and rate limits
Delayed Triggers
Potential causes and solutions:
- •Check platform API for delays or outages
- •Verify API connection to the platform isn’t being throttled
- •Check Wakflo system status
- •Review network latency between systems
- •Consider implementing retry logic for time-sensitive triggers
Missing or Incorrect Data
Data quality issues:
- •Verify the trigger is receiving the expected data format
- •Check for changes in the source system’s data structure
- •Implement data validation steps early in the workflow
- •Add logging to track what data is being received
- •Review API documentation for any recent changes
Common Trigger Examples
E-commerce Order Processing
1. New Order Trigger → Customer places order
2. Order Status Change → Payment processed
3. Inventory Update → Stock levels adjusted
4. Shipping Notification → Order shipped
5. Delivery Confirmation → Order delivered
Inventory Management
1. Low Stock Alert → Inventory below threshold
2. Reorder Trigger → Purchase order created
3. Supplier Response → Inventory replenished
4. Price Change → Product pricing updated
5. Scheduled Audit → Regular inventory review
Customer Engagement
1. New Customer → Welcome email sequence
2. Purchase History → Personalized recommendations
3. Abandoned Cart → Recovery email campaign
4. Review Request → Post-purchase follow-up
5. Birthday Trigger → Special offers and greetings
Advanced Trigger Configuration
Trigger Filters
Filter Configuration Examples
High-Value Orders
order.total >= 500VIP Customers
customer.tags.includes('VIP')Specific Product Categories
product.category === 'Electronics'Business Hours Only
hour >= 9 && hour < 17Trigger Rate Limiting
Managing High-Volume Triggers
Batch Processing
Group multiple events together and process them as batches
Sampling
Process only a percentage of events to manage volume
Debouncing
Wait for a quiet period before processing accumulated events
Priority Queues
Process high-priority events first during busy periods
Trigger Monitoring and Analytics
Track these key metrics to ensure your triggers are performing optimally.
Key Metrics to Track
Trigger Frequency
How often triggers fire and identify patterns
Success Rate
Percentage of triggers that successfully start workflows
Response Time
Time between event occurrence and trigger activation
Error Patterns
Common failure modes and their frequencies
Data Quality
Completeness and accuracy of trigger data
Filter Effectiveness
How well filters reduce unnecessary executions
Next Steps
Now that you understand how to configure triggers, learn how to build the rest of your workflow.